OpenCV Object Detection and Face Recognition Library on Raspberry Pi 4
#Interesting solutions #Pattern Recognition #Neural Networks
#Interesting solutions #Pattern Recognition #Neural Networks
Author: Serhii Rybalko, TechLead
This article was produced as part of Evergreen's in-house mentoring and training programme.
OpenCV is an open-source library for computer vision, image processing and computational algorithms with fairly broad functionality. We have been actively using it in our products, such as the OCR Solutions system — a recognition service for car registration documents, foreign passports and other documents. In general, OpenCV forms an integral part of our stack in AI and computer vision systems design. The library is implemented in C/C++ and supports Python, Java, Ruby, Matlab, Lua and other languages.
1. Cropping an image.
It is one of the basic features. OpenCV is a fairly simple and straightforward API: if we want to cut part of the original image, we specify the coordinates, crop and keep going.
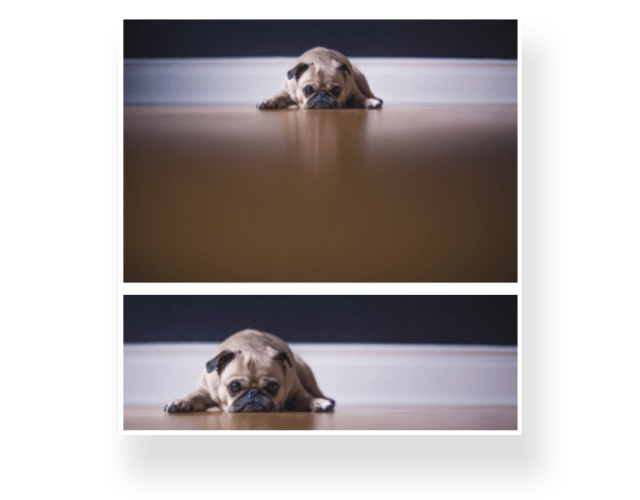
Source: opencv.org
2. Resize.
Changing the size of a picture to an optimal one. It is required, for example, for convolutional neural networks to reduce the load on the system, and for ease of operation in general.
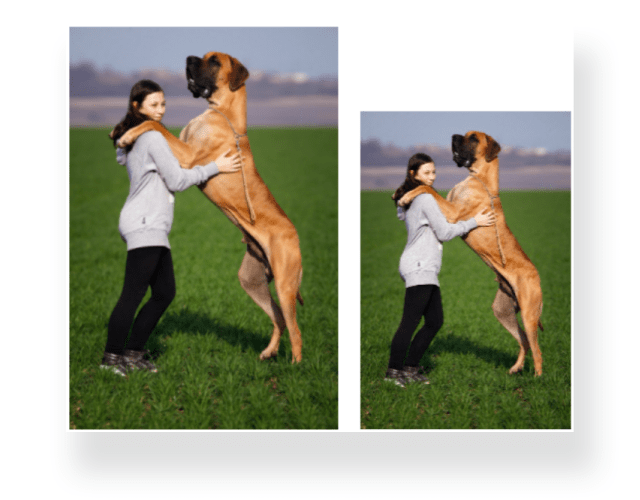 Source: opencv.org
3. Image rotation.
You can rotate the original image in any position, mirror and so on.
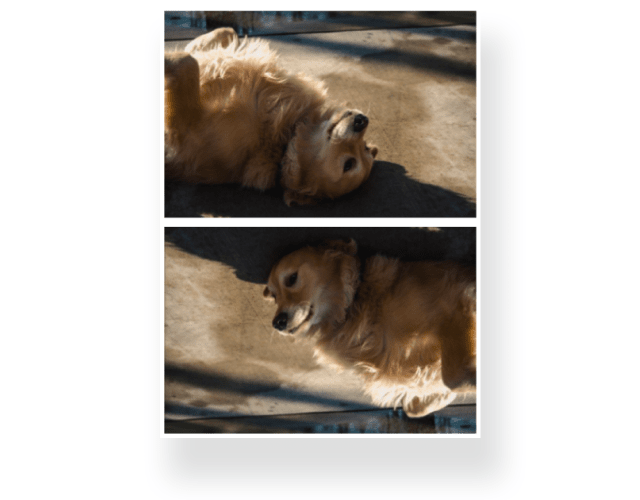
Source: opencv.org
4. Converting a colour image to grayscale.
There are some frequent algorithms where we need to highlight some important details of an image by fine-tuning the triggering threshold. We use this technique quite often in our work.
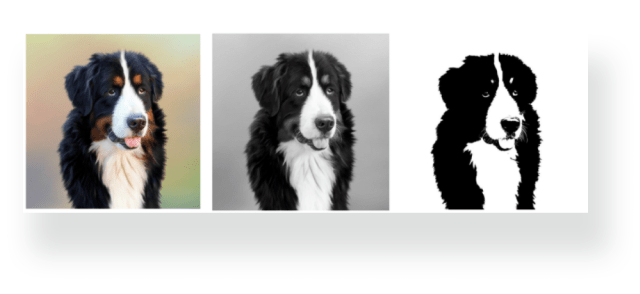
Source: opencv.org
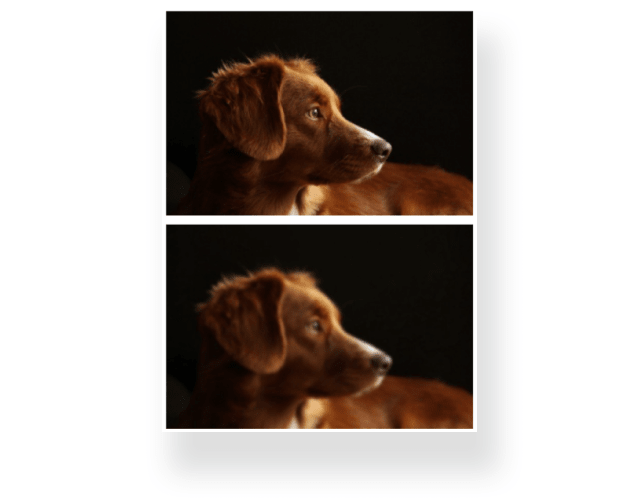
5. Blur/Aliasing.
This option is needed to smooth an initially sharp image. But it cannot convert a blurred picture into a clear one — other algorithms can help you do that.
Source: opencv.org
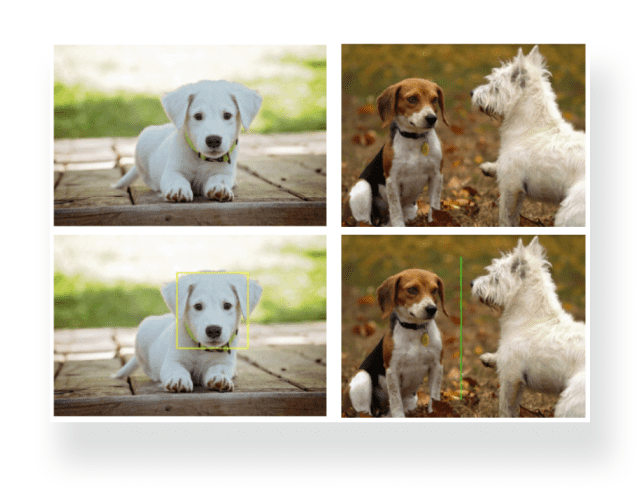
6. Drawing rectangles and lines on images.
We use rectangles to mark object edges when annotating datasets for recognition systems and also use labels to indicate which objects are in the picture, where exactly and how many. By the way, you can find detailed articles on this subject here and here. Drawing is not limited to rectangles: you can draw all kinds of geometric shapes, fill them in with colour, and change the thickness and colour of lines.
 Source: opencv.org
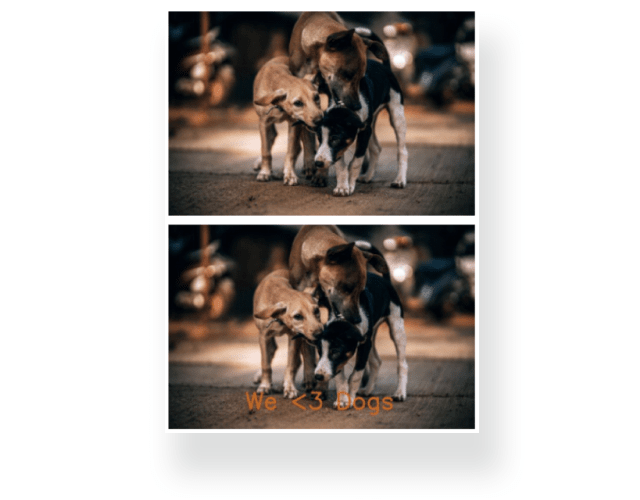
7. Text on image.
We also use this function when working with video — when we need to dynamically display some parameters, or what is currently happening on the screen: video frame rate, number of any real-time tracked objects in the counting systems, additional debugging information.
Source: opencv.org
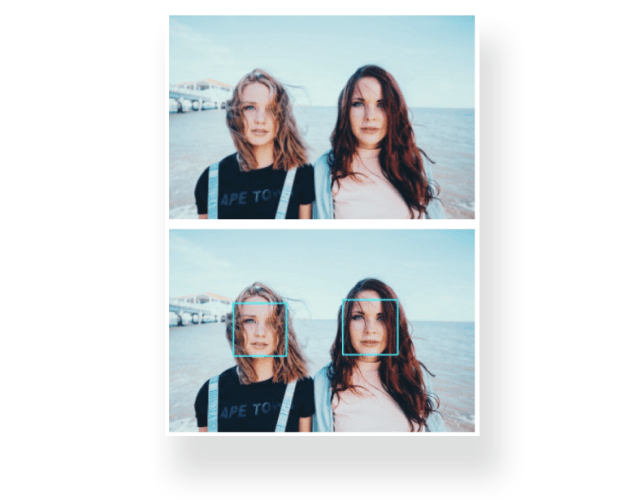
8. Face detection.
OpenCV feature detection is quite capable of locating objects in an image using pre-trained neural networks models. A default model has been used in the below example to detect front-facing faces (it recognises head rotation of up to about 30 degrees). OpenCV can detect faces very quickly. In doing so, we don't identify the person, but only determine that a particular frame area contains a face image, with some certainty. So, how does it work?
Source: opencv.org
The sliding window principle (Viola-Jones method) is used to search for faces. A Haar-like feature is calculated for each area of the image over which the window passes. The difference between the feature value and the training threshold determines the presence or absence of an object in the detection window. The window seems to glide over the entire image. After each passing of the image, it enlarges to find faces on a larger scale.
A Haar-like feature considers adjacent rectangular regions at a specific location in a detection window, sums up the pixel intensities in each region and calculates the difference between these sums. This difference will be used to calculate the value of a particular subsection in an image.
With a human face, it is a common observation that the region of the eyes is darker than the region of the cheeks. Therefore, a common Haar feature for face detection is a set of two adjacent rectangles that lie above the eye and the cheek region.
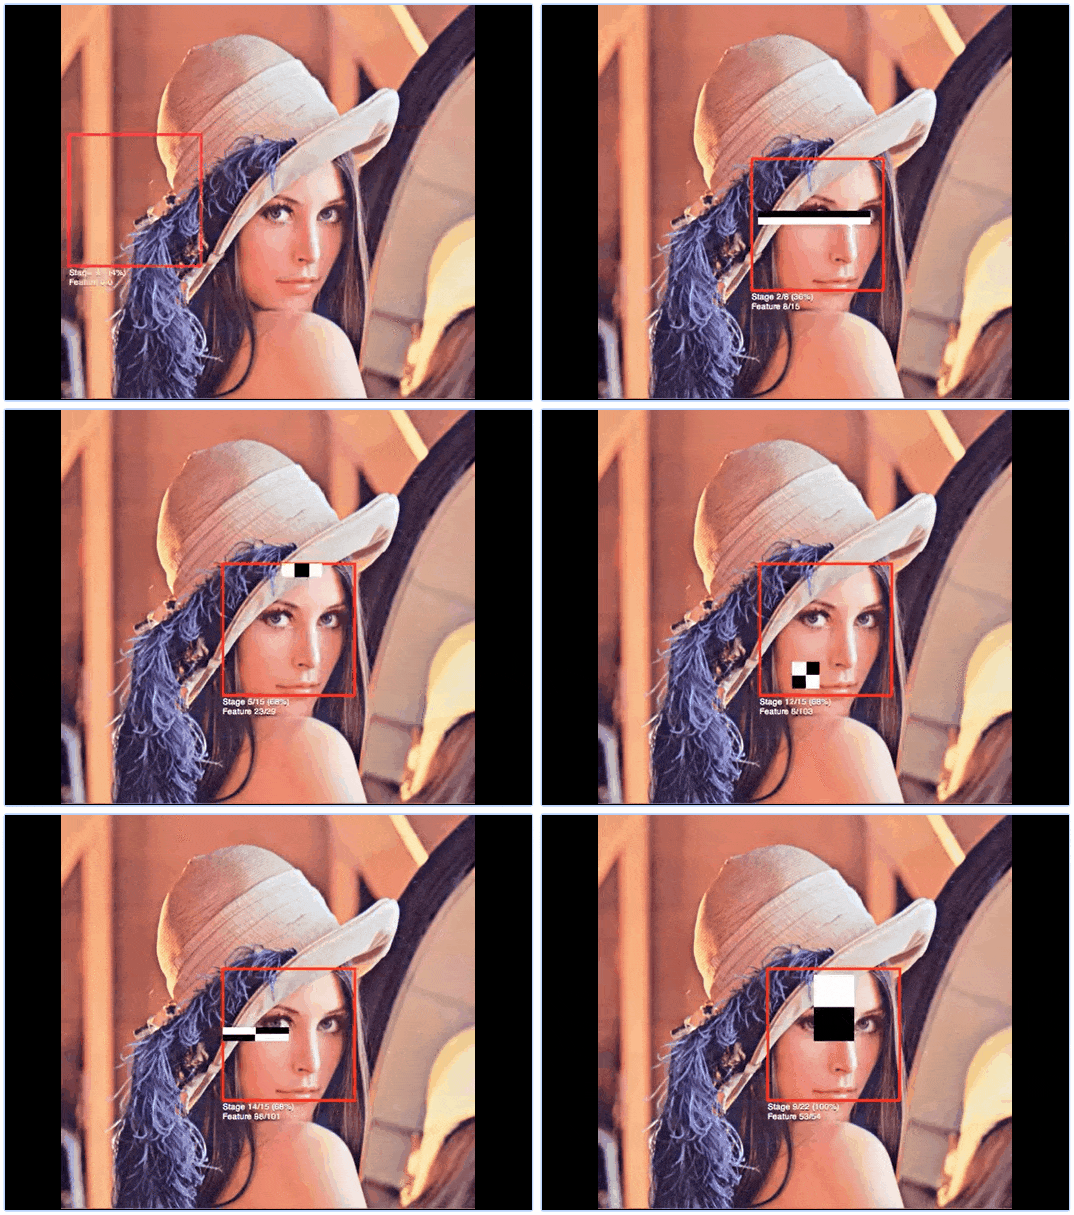
Source: Adam Harvey/ vimeo.com
Face recognition itself in OpenCV is remarkably fast — it takes fractions of a second. This model is quite hard and time-consuming to train, but from our experience, it works much faster than neural networks using TensorFlow. And it doesn't even need a GPU to work well. What else will we use in recognition systems?
Another open-source library that was built on dlib C++ Library. It is highly accurate, easy to use, easy to deploy on a server even without an expensive GPU, and has rather simple requirements. So, what can the Face Recognition Library do?
1. Face search in a photo.
We input an image and detect faces plus or minus as in OpenCV except for that in this library, the threshold is higher - head rotation of more than 30 degrees is allowed.
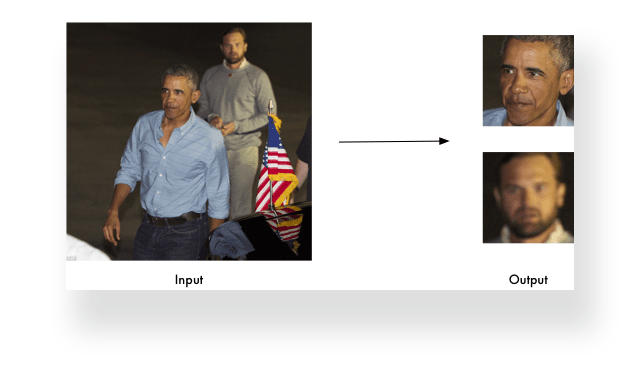 Source: pypi.org
2. Detection of facial features.
Picture recognition with the acquisition of the contours and facial features required for identification (eyes, nose, mouth, chin).
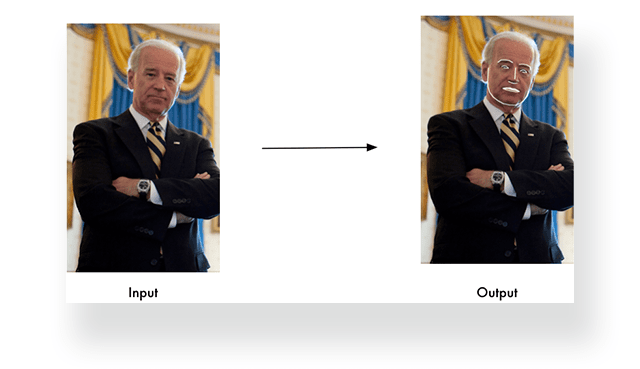
Source: pypi.org
3. Facial landmarks detection.
The eye contour is based on 6 points, and the facial map contains a total of 68 points that allow facial comparison and identification with great accuracy.
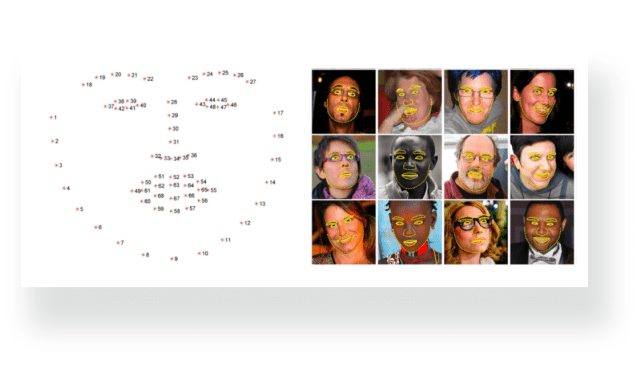
Source: researchgate.net
4. Face identification in photos.
Obtaining data on the person in each photo. We can create a database of "familiar" faces (employees, clients), recognise them and identify "strangers" using the ratio of facial landmarks' coordinates.
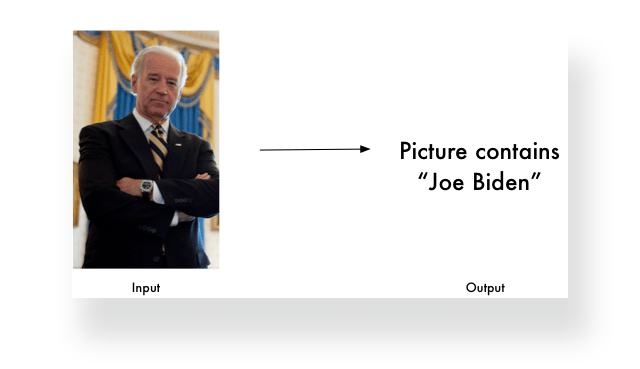 Source: pypi.org
5. Real-time applications.
We can use this recognition to work with live streaming video and use it with other Python libraries.
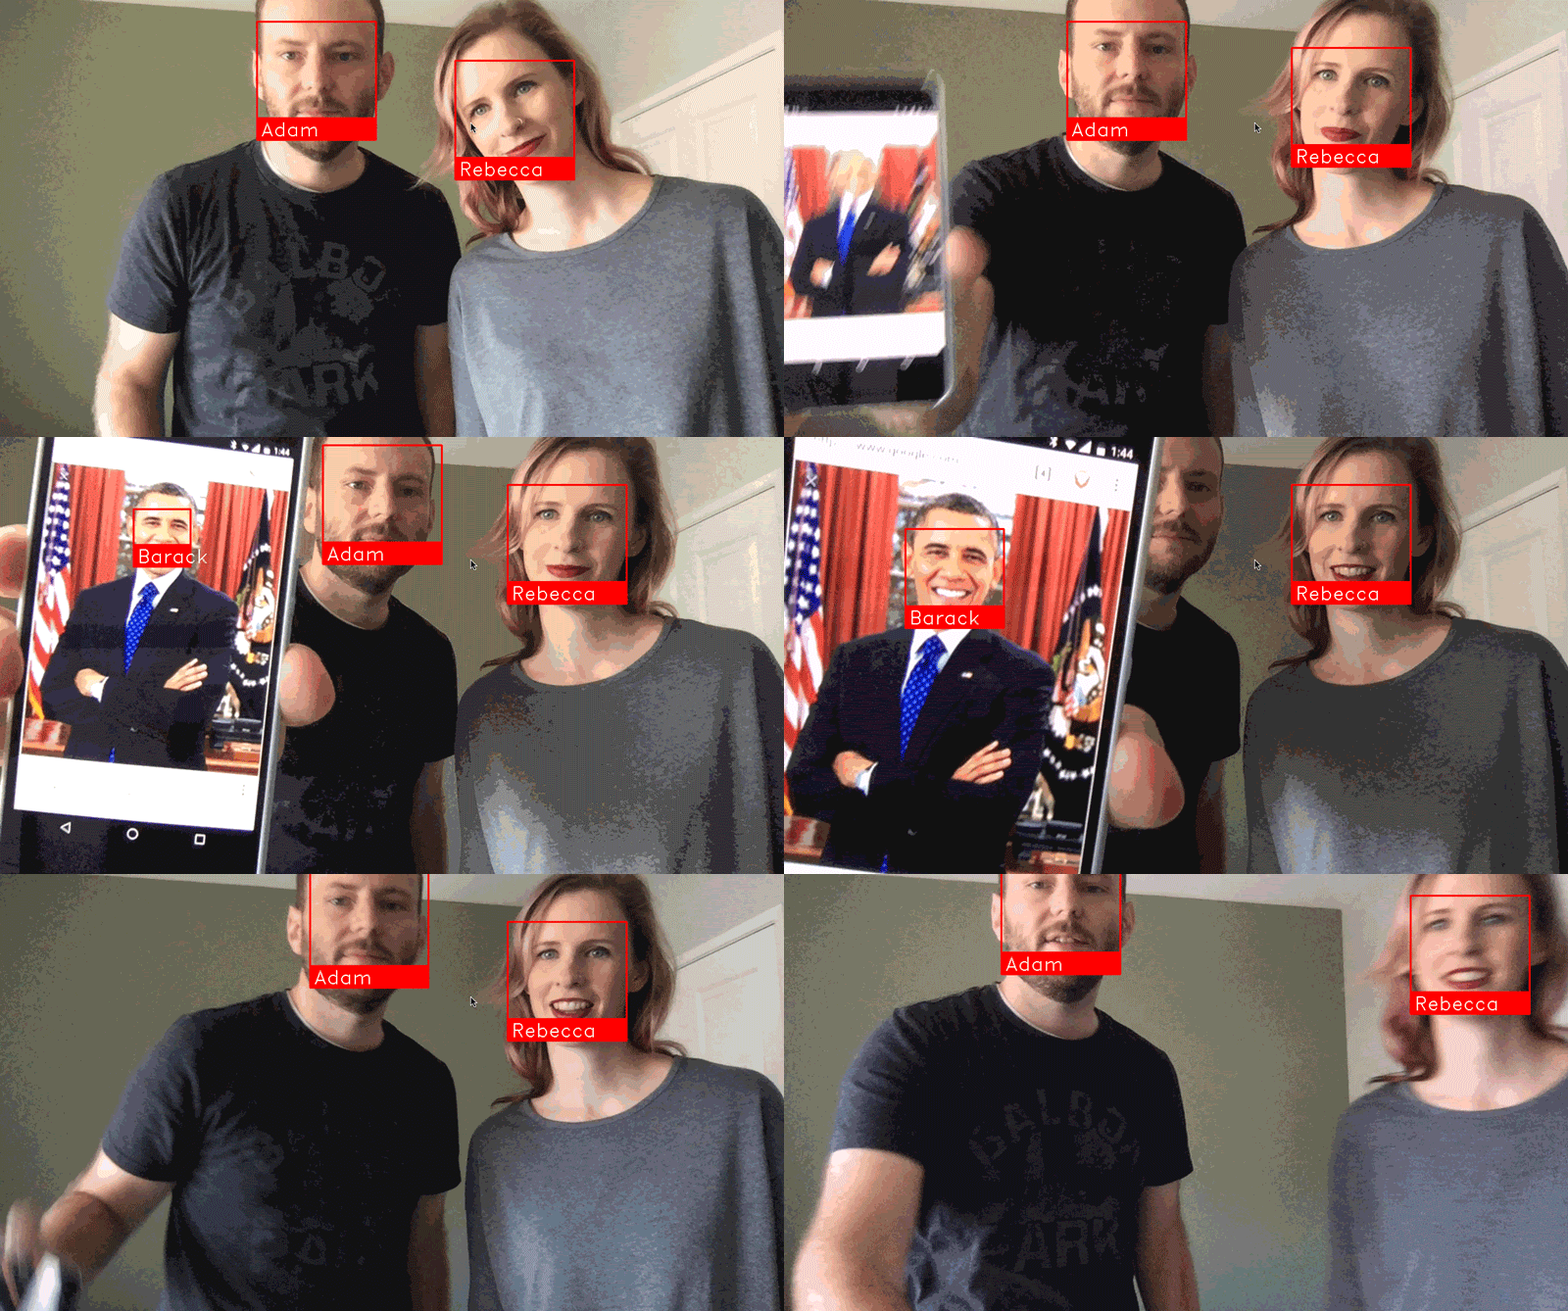
Source: pypi.org
It is a single-board computer, quite powerful for its small size. In our case, we used the 4GB RAM version. What's on the board: an Ethernet port, USB 3, USB 2, Micro HDMI ports with support for two 4K displays, and USB-C power supply. It's compact enough with low power consumption and high performance.
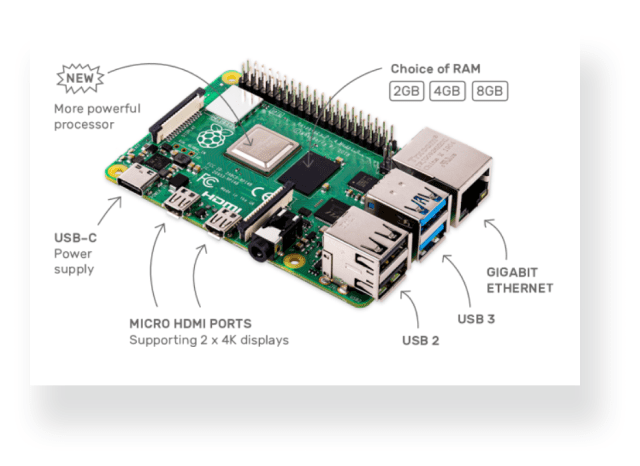 Source: raspberrypi.org
For facial recognition purposes, we install the OpenCV, face_recognition and imutils packages on the Raspberry Pi to train the platform based on the images used as a dataset. We can also connect a camera and work with live video streaming.
First, you need to prepare a dataset - a collection of images to work with. We create a separate folder containing pictures for each person in the database. After we have prepared the images, we launch a script to run through all of the pictures and generate a database of identified faces. Upon completion, we obtain a set of facial landmarks maps for each photo (there can be several maps for one person, one for each photo). The more images of the same person from different angles, the more precisely the system learns to recognize them from different angles, e.g. on video.
What happens next? A webcam image arrives at the input. Primarily, it triggers OpenCV, which detects whether a face (faces) is present in the picture. If any faces are found, we get their coordinates and conditionally crop only this part of the frame, pass it for recognition and compare it with the database - looking for a match. As a result, we see a rectangle with a name or other inscription ("person unknown") and so on.
And where can this be applied in practice? For example, for employee time and attendance monitoring (their exact start and end times), tracking visitors in your premises, etc. Options can be many.
In this configuration, the video processing speed is approximately 2 frames per second. The more faces found in an image, the more calculations there will be for each frame (recall that the face mapping algorithm detects 68 facial points), and the lower the system performance.
The answer is yes. The trouble with Raspberry Pi 4's processing speed can be solved by connecting an additional device, such as the Google Coral USB Accelerator. It is essentially a TPU processor, and it performs even better than a standalone GPU solution. There are plenty of different default models for it on the official website, tailored to use the Coral hardware. You can also use the regular TensorFlow models translated into TensorFlow Lite, and compile TensorFlow Lite models for Coral.
We have solutions to boost Raspberry Pi 4 single-board performance based on the use of Coral Accelerator. Such an accelerator allows processing the same 25 fps in real-time instead of 2 fps quite feasibly. You can experiment with different sets of facial and object recognition libraries. And even with such seemingly unpretentious hardware, it is possible to build effective systems for employee tracking, counting visitors at shopping malls, motion tracking, and analytics.
We hope that we managed to get you interested and rest assured that our team has many non-standard solutions in-store. Got inspired by a project idea? You are welcome to contact us — and we will take care of its implementation.